Rich & Creamy Roasted Butternut Squash Soup
A Complete Guide to a Rich, Velvety Classic
Roasted butternut squash soup is one of those dishes that looks fancy but is unbelievably simple to make when you understand the process. Most people mess it up by under-roasting the squash, adding too much liquid, or skipping the seasoning steps that bring all the flavor together. This guide fixes all those issues by showing you exactly how to build a soup that tastes deep, naturally sweet, and velvety smooth. No shortcuts, no watery texture, and no bland mouthfuls.
The beauty of roasted butternut squash soup is that it’s incredibly flexible. You can make it rich and creamy, you can keep it light, or you can spice it up for a winter kick. But at the core of every great version lies the same fundamentals: proper roasting, balanced aromatics, and controlled blending. If your soup isn’t coming out smooth or full of flavor, you’re missing one of those elements.
This recipe covers everything from selecting the right squash to roasting it to perfection, then building layers of flavor with onion, garlic, butter, and broth. You’ll end up with a soup that tastes like restaurant quality without needing restaurant experience.
Why Roasting Makes All the Difference
If you try to make squash soup by boiling it, you lose half the flavor right there. Roasting concentrates the sweetness, promotes caramelization, and removes excess water. It gives you that deep, almost nutty richness that boiling simply can’t deliver.
Butternut squash is naturally mild. Roasting amplifies the sweetness and gives the soup body. The edges get caramelized, which brings a subtle brown-sugar vibe. If you roast correctly, you don’t need to add unnecessary sweeteners.
Choosing the Right Butternut Squash
Not all squash are equal. A poor squash leads to watery, bland soup.
Look for:
- Hard, firm skin
- Deep beige color
- No green streaks
- Heavy for its size (indicates density)
- A matte finish instead of shiny
Avoid soft spots or wrinkles because those mean the squash is drying out inside.
A medium-large squash (around 2.5 to 3 pounds) grants enough flesh for a big pot of soup. Smaller ones tend to have too many seeds and too little actual fruit.
Prep Work That Actually Matters
Most people rush this part. Don’t.
Slice the squash vertically. Scoop out the seeds. Rub cut sides with olive oil. Add salt and pepper—don’t skip seasoning at this stage. Put the squash cut-side down on a baking sheet. This positioning helps it steam slightly while browning on the outside, giving you tender flesh and caramelized edges.
Roast it at 400°F (205°C) for around 45–55 minutes until a knife slides through without resistance. If your squash isn’t fully soft after roasting, your soup will be grainy. Don’t pull it out early.
Building the Flavor Base: The Aromatics
Aromatics are the backbone of this soup. Without them, your soup tastes one-dimensional.
You need:
- Onion
- Garlic
- Celery (optional but adds depth)
- Butter or olive oil
- Herbs like thyme or sage
Sauté the onions first until they’re soft and slightly golden. Add garlic near the end, so it doesn’t burn. If you’re adding celery or carrots, soften them properly before moving on.
This step creates the savory foundation that balances the squash’s sweetness.
Full Roasted Butternut Squash Soup Recipe
Now let’s break it down into a clean, consistent method you can follow every time.
Step 1: Roast the Squash
Cut the squash lengthwise, remove seeds, oil it, season it, and roast it cut-side down at 400°F (205°C) for 45–55 minutes. When it’s soft and caramelized, scoop out the flesh and set it aside.
Step 2: Prepare the Aromatics
Heat butter or olive oil in a pot. Add chopped onions and sauté them until soft and slightly golden. Add garlic and cook for about 30 seconds. Add herbs like thyme, sage, or bay leaf.
Step 3: Add the Roasted Squash
Add the roasted squash flesh into the pot and stir it with the aromatics so the flavors blend.
Step 4: Pour in the Liquid
Use vegetable broth or chicken broth. Start with just enough to cover the squash. You can add more later depending on the thickness you want. Don’t drown it.
Step 5: Simmer
Simmer the soup for 15–20 minutes to let all flavors meld together. This step is non-negotiable.
Step 6: Blend Until Silky Smooth
Blend using an immersion blender or a stand blender. If you want an ultra-smooth texture, blend it twice. But don’t over-blend with a stand blender, or the soup can get gummy.
Step 7: Add the Final Creaminess
At the end, stir in heavy cream, coconut milk, or even Greek yogurt depending on the flavor profile you want.
Step 8: Adjust Seasoning
Taste it. Add salt, pepper, or a splash of lemon juice to balance sweetness. If it feels flat, it needs salt or acidity.
What Makes This Soup Silky Instead of Grainy
Graininess comes from one of three things:
- Undercooked squash
- Not fully caramelized onions
- Not blending long enough
To make it smooth, the squash must be roasted until soft, the base must be well-cooked, and the blending must be thorough. Rushing one of these will ruin the texture.
Flavor Variations Worth Trying
This soup is versatile. You can customize it endlessly depending on your mood.
Coconut Curry Version
Add curry powder, cumin, and coconut milk. This gives a warm, tropical, slightly spicy flavor.
Maple Bacon Version
Add crispy bacon on top and stir in a tablespoon of pure maple syrup. The contrast is exceptional.
Spicy Chipotle Version
Add chipotle peppers in adobo for smoky heat.
Italian Herb Version
Use rosemary, sage, and parmesan for an earthy, savory twist.
Sweet Carrot Blend
Add roasted carrots along with the squash for more depth and sweetness.
Apple-Squash Combo
A chopped apple roasted alongside the squash adds brightness.
Toppings That Make the Bowl Better
Toppings change everything. A well-chosen topping adds crunch, freshness, or richness.
Best topping ideas:
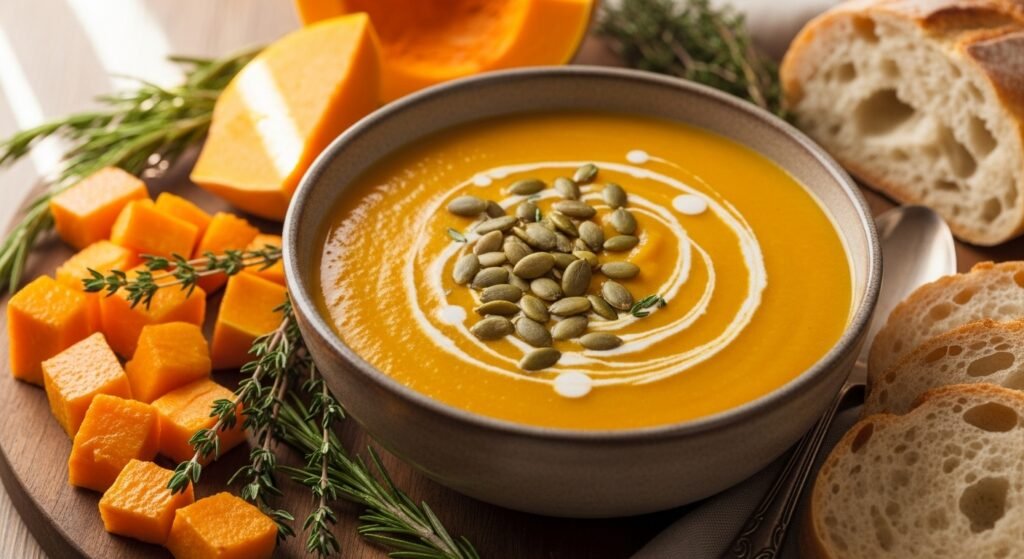
- Toasted pumpkin seeds
- Crispy fried onions
- Garlic croutons
- Sour cream or crème fraîche
- Fresh herbs
- Bacon bits
- Toasted nuts
- Drizzle of olive oil or chili oil
A creamy soup needs contrast. Don’t skip toppings unless you really want a monotone bowl.
What to Serve With Roasted Butternut Squash Soup
This soup can be a meal or a starter depending on the pairing.
Great sides:
- Grilled cheese sandwiches
- Garlic bread
- Roasted vegetables
- Simple mixed greens salad
- Crusty baguette
- Roasted chicken
- Sauteed mushrooms
The soup is rich, so pairing it with something crisp or crunchy works best.
Storage, Reheating, and Freezing Tips
This soup stores extremely well, and the flavor sometimes improves overnight.
Refrigeration
It lasts for 4–5 days in the fridge. Use an airtight container.
Freezing
It freezes beautifully. Portion it into containers, leave space at the top, and freeze for up to 3 months.
Reheating
Reheat on the stove over medium heat. Add a splash of broth or water if it thickens too much in storage. Stir well to avoid separation.
Microwaving works but can heat unevenly, so stir frequently.
Common Mistakes People Make
If your soup didn’t come out right before, you probably did one of these:
You Didn’t Roast Long Enough
The squash must be fully soft and caramelized. Undercooked squash = grainy soup.
You Used Too Much Broth
Butternut squash is mild. Add broth slowly so you don’t thin the soup too much.
You Skipped Sautéing the Aromatics
Raw onions ruin the flavor.
You Didn’t Season Properly
Soup needs seasoning at every stage, especially at the end.
You Used Low-Quality Squash
Old, dry, or stringy squash destroys texture.
Final Thoughts
A roasted butternut squash soup recipe seems simple, but executing it well is the difference between a bland bowl and an unforgettable dish. Roast properly, season at every step, blend until silky, and finish with the right toppings. Do that, and you’ll create a soup that feels comforting, rich, and layered with flavor.