Smart Tips to Keep Your Nonstick Pans New
Why Nonstick Pans Lose Their Coating Faster Than You Think
If your nonstick pan starts sticking after a few months, that’s not “bad luck.” It’s because these pans are sensitive, and most people abuse them without realizing it. High heat, metal utensils, harsh scrubbing, and improper storage destroy the coating. If you want your pan to last years instead of months, you need the right habits from day one.
Understand How Nonstick Coating Actually Works
Nonstick coating isn’t magic — it’s a thin artificial surface applied to the pan. It’s not indestructible.
The coating lasts only as long as you protect it. The moment you scratch it, heat-shock it, or burn oil onto it, its lifespan drops dramatically.
Knowing this helps you stop doing the things that kill nonstick cookware.
Season the Pan Before First Use (Yes, Even Nonstick)
Most people skip this step, and it costs them the pan.
Seasoning creates a thin protective oil layer that fills microscopic gaps in the coating.
How to Season a Nonstick Pan
- Wash and dry the pan.
- Add 1 teaspoon of cooking oil.
- Spread it evenly with a tissue.
- Heat the pan on low for 1 minute.
- Wipe off excess oil after cooling.
Do this once a month to keep the coating slippery and smooth.
Never Use High Heat on a Nonstick Pan
This is the biggest mistake people make.
Nonstick coatings break down above medium heat.
High heat does two things:
- Warps the base metal
- Damages the coating at a molecular level
If you cook on high heat daily, don’t expect your pan to survive.
Safe Heat Zones
- Low to medium heat = perfect
- High heat = guaranteed pan damage
If you need high heat cooking, use a stainless steel or cast iron pan instead.
Always Preheat the Pan the Right Way
You shouldn’t preheat a dry nonstick pan — it overheats fast.
Always add a little oil, butter, or water before turning on the stove.
This helps regulate temperature and protects the coating.
Use the Right Oils — Avoid Low Smoke Point Oils
If you use oils like extra virgin olive oil on high flame, they burn and form sticky carbon residues.
This residue bonds to the coating and ruins the nonstick surface.
Best Oils for Nonstick Pans
- Sunflower oil
- Canola oil
- Rice bran oil
- Refined olive oil
Oils to Avoid
- Extra virgin olive oil
- Ghee on high heat
- Butter on high flame
Burnt oil = destroyed nonstick coating.
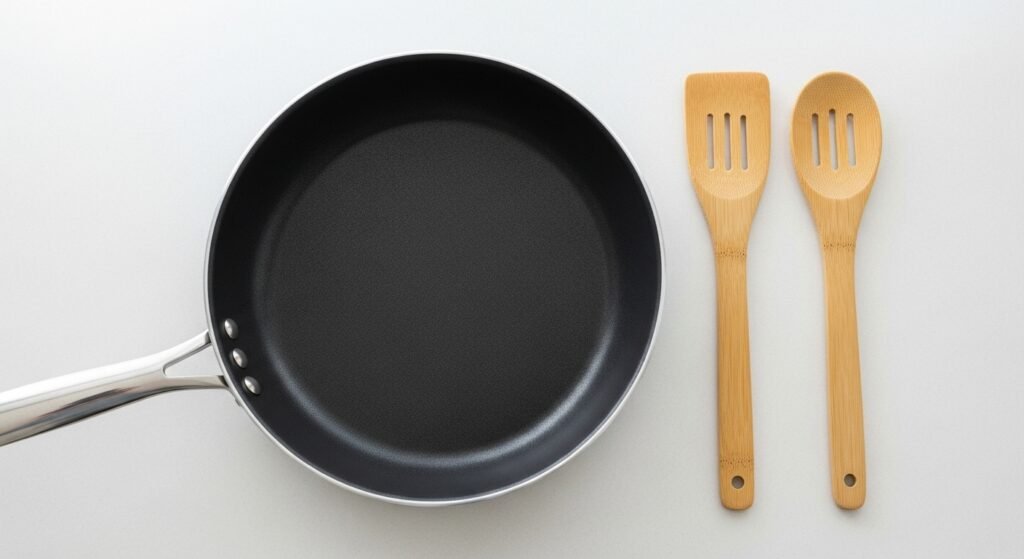
Use Only Soft, Safe Utensils
Metal utensils are the enemy of nonstick cookware. Even one rough scrape can create microscopic scratches. These scratches expand with every wash until the coating starts peeling.
Safe Utensil Materials
- Silicone
- Nylon
- Wooden
- Heatproof plastic
Avoid at all costs
- Steel spoons
- Metal spatulas
- Knives
- Forks
If you’re using metal utensils on a nonstick pan, you’re actively killing it.
Never Cut Food Directly in the Pan
People who cut eggs, omelets, or parathas inside the pan destroy the surface instantly. Don’t do it.
Use a chopping board. The pan is for cooking, not cutting.
Avoid Using Cooking Sprays
Cooking sprays leave a sticky film that builds up over time and ruins the coating.
They make the surface gummy and impossible to clean.
Use real oil in very small amounts instead of aerosol sprays.
Clean the Pan Immediately After Cooking
Letting residue dry on the surface makes cleaning harder and increases the chance of scraping.
As soon as the pan cools slightly, rinse it.
Proper Cleaning Steps
- Wait for the pan to cool naturally.
- Rinse with warm water.
- Add a few drops of mild dish soap.
- Use a soft sponge or microfiber cloth.
- Rinse and dry completely.
Do NOT use:
- Steel wool
- Harsh scrubbers
- Dishwasher tabs
- Abrasive powders
They destroy the coating.
Never Shock the Pan With Sudden Temperature Change
Pouring cold water into a hot nonstick pan will warp the metal instantly and crack the coating.
Always let the pan cool naturally for 5–10 minutes before washing.
Remove Burnt Residue Without Scratching
Sometimes food burns. Don’t try to scrape it out aggressively.
Safe Method
- Fill pan with warm water.
- Add dish soap.
- Heat on stove for 1–2 minutes.
- Let it soak 10 minutes.
- Gently wipe clean.
This loosens burnt bits without damaging the coating.
Handle the Outside of the Pan Carefully Too
People only think about the inside, but the outside matters too.
Burnt oil stains and carbon buildup on the bottom increase heat unevenness and shorten life.
Clean the Exterior Properly
- Use a soft scrub pad
- Avoid metal scrubbers
- Clean the base after every use
A dirty base means uneven cooking and quicker coating damage.
Avoid Stacking Pans Without Protection
Stacking nonstick pans directly on top of each other causes scratches even if you don’t see them immediately.
Safe Storage
- Use pan protectors
- Place tissue paper or cloth between pans
- Store vertically if possible
This prevents friction damage.
Do Not Use Nonstick Pans in the Dishwasher
Even if the manufacturer says it’s “dishwasher safe,” don’t trust it.
Dishwashers use strong detergents and high heat, which destroy nonstick coatings.
Hand wash only — it’s the safest method.
Don’t Use Metal Whisks or Electric Mixers Inside the Pan
This is a silent killer for nonstick surfaces.
Using mixers, beaters, or whisks inside the pan guarantees deep scratches.
Mix your batter or eggs in a separate bowl.
Know When Your Pan Is Actually Dying
If the coating is seriously scratched or peeling, don’t keep cooking on it.
Damaged nonstick coating doesn’t work well and isn’t safe to use long term.
Signs your pan is near the end:
- Food sticks even with oil
- Coating looks dull and uneven
- Scratches you can feel with a finger
- Surface looks patchy
At that point, replacing the pan is better than forcing it to work.
Make This Simple Habit After Every Use
If you want the coating to stay smooth:
- Wash the pan gently
- Dry completely
- Rub 3–4 drops of oil with a tissue
This micro-seasoning protects the nonstick layer and gives it a longer life.
Understand What Nonstick Pans Are NOT Built For
People expect nonstick pans to do everything — frying, searing, deep roasting — and that’s why they fail so quickly.
Nonstick pans are NOT suitable for:
- High-heat searing
- Deep frying
- Dry roasting spices
- Heating empty on flame
- Using metal tools
- Oven cooking above the safe temperature
Use the right pan for the right job.
Extend Lifespan With These Smart Tricks
These small habits make a big difference:
Use Lower Heat Most of the Time
Your pan survives longer and cooks more evenly.
Keep Oil Moving
Don’t let oil burn in one spot.
Don’t Use Too Much Oil
It doesn’t protect the coating; it burns instead.
Store the Pan in a Dry Spot
Moisture buildup ruins metal bases.
Never Leave Food Sitting in the Pan
The acidity of tomato, lemon, or vinegar-based dishes damages the coating if left too long.
Final Thoughts: Treat Your Nonstick Pan Like a Tool, Not a Toy
Nonstick pans aren’t built for abuse. If you want them to last, you need habits that protect the coating instead of destroying it. The goal is simple — cook smart, clean gently, store properly, and avoid shortcuts that damage the surface.