The Smart Way to Clean Your Blender Fast
A Complete Step-by-Step Guide
Why Cleaning Your Blender Properly Actually Matters
If you think a quick rinse is enough, you’re fooling yourself. Blenders trap food in tiny corners — under the blades, around the rubber gasket, and inside the lid grooves. If you don’t clean it properly, bacteria grow fast, smells develop, and the blades dull over time. A dirty blender can even ruin the taste of your smoothies or sauces. So yes, learning how to clean a blender the right way isn’t optional — especially if you use it daily.
The Quickest and Easiest Method: The Self-Clean Hack
If you’re lazy or always in a rush, this is the method you’ll actually use — and it works surprisingly well.
Step-by-Step Self-Clean Method
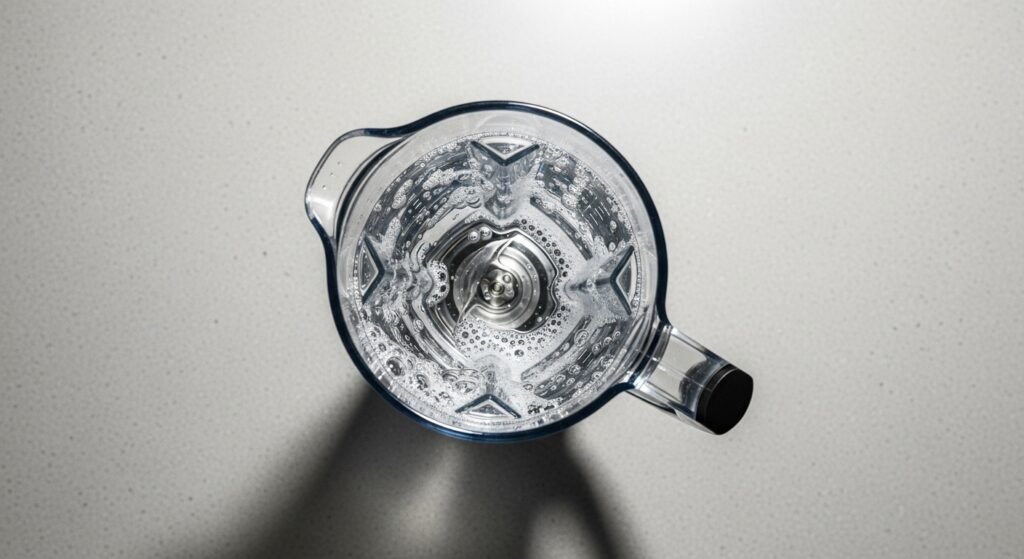
- Fill the blender halfway with warm water.
- Add 1–2 drops of dish soap — not more, unless you want a foam volcano.
- Put the lid on securely.
- Run the blender for 20–30 seconds.
- Empty the soapy water and rinse thoroughly with warm water.
This alone removes 80–90% of the mess, especially right after blending. But it’s not enough if you’ve made something sticky, oily, or smelly.
Deep Cleaning for When the Blender Smells or Feels Greasy
Smoothies with bananas, garlic pastes, spicy chutneys, nut butters — these leave behind serious residue. Deep cleaning prevents build-up and keeps your blender fresh.
Step 1: Take the Blender Apart
Don’t be stubborn. If you never dismantle the blade assembly, it WILL collect grime. Remove:
- Jar
- Lid
- Blade base
- Gasket ring
If your blender jar is fixed and non-removable (common in cheaper models), skip this and use the vinegar method later.
Step 2: Scrub Each Part Separately
Use a soft sponge or bottle brush. Don’t use steel scrubbers — they will scratch the plastic and create permanent odor-trapping grooves.
Step 3: Clean the Blades Safely
This is where most people get careless. Don’t scrub the blades aggressively — you’ll nick your fingers, and it’s unnecessary.
Better method:
- Fill the jar with warm soapy water
- Add the blades inside the jar
- Use a long brush to move around the base
Never press your fingers against the blades.
Step 4: Clean the Lid and Rubber Seal
These parts trap the worst smells. Scrub inside all grooves. If it still smells, soak for 10 minutes in:
- Warm water
- 1 teaspoon baking soda
- 1 teaspoon vinegar
It removes trapped odors and oil.
Step 5: Dry Everything Completely
Water trapped under the blade base encourages fungus. Don’t assemble anything until it is fully dry.
How to Remove Strong Odors (Garlic, Onion, Coffee, Spices)
If your blender stinks even after washing, use a deodorizing clean.
Baking Soda Deodorizing Paste
- Make a thick paste with baking soda and water.
- Spread inside the jar.
- Leave for 30 minutes.
- Wash and rinse.
Lemon and Hot Water Blend
This is also great for cloudiness and light stains.
- Warm water
- 1 tablespoon lemon juice
- Blend 20 seconds
- Rinse
Vinegar Steam Clean
Useful when the blender smells SOUR.
- Fill jar with hot water
- Add 2 tablespoons vinegar
- Let sit 15 minutes
- Wash normally
This removes trapped food smells quickly.
How to Clean a Blender With Stuck-On Residue
If your jar has sticky bits, dried fruit, protein powder cement, or spice paste stuck to the sides, do this:
Hot Soak Method
- Fill the jar with very hot water.
- Add dish soap.
- Let it sit 30–40 minutes.
- Use a soft brush to remove residue.
Salt + Dish Soap Scrub
Salt works as a mild abrasive that doesn’t scratch plastic.
- Add 2 tablespoons salt
- Add a few drops of dish soap
- Scrub with a sponge
Great for stubborn sticky layers.
How to Clean Cloudy Blender Jars
Plastic jars often turn cloudy because of mineral deposits, hard water, or scratches. You can fix some of this.
Vinegar and Baking Soda Cloudiness Fix
- Add 1 cup warm vinegar
- Add 1 tablespoon baking soda
- Let fizz for 5 minutes
- Scrub with a bottle brush
- Rinse thoroughly
Lemon Sponge Method
Cut a lemon in half, dip in salt, and scrub inside the jar.
This removes stains and adds shine.
How to Clean a Blender Base (Without Damaging It)
The base NEVER goes under water. If you do that, congratulations — you’ve broken your blender.
Safe Method
- Unplug the blender
- Wipe with a damp cloth
- For sticky spills, use a little soapy water
- Clean around buttons with a toothbrush
- Dry immediately
If something spills into the button gaps, clean it immediately before it hardens.
How to Clean a Blender Bottle or Personal Blender Cup
These cups trap smells faster than full-size jars.
Quick Cleaning
- Self-clean method works
- But do it immediately after use
Deep Clean for Bottle Smell
- Add warm water
- Add 1 teaspoon baking soda
- Add 1 teaspoon vinegar
- Shake
- Leave 10 minutes
- Rinse
Never leave protein shake residue inside. It smells terrible.
How to Clean a Blender After Grinding Spices
This leaves oily residue and smell. Doing it wrong can ruin your next smoothie.
Best Cleaning Process
- Brush out dry spice powder
- Add warm soapy water
- Blend 10–15 seconds
- Rinse
- Blend again with warm water + 1 spoon lemon juice
- Rinse thoroughly
This clears spices and oil.
How to Clean a Blender Used for Hot Soups
Hot soups create oily film that sticks to the jar.
Use This Method
- Rinse immediately with warm water
- Add dish soap + hot water
- Blend
- Rinse
- Scrub lightly around the lid seal
Don’t let soup cool inside — it becomes a nightmare to clean.
How to Prevent Blender Stains and Odors Long-Term
Most people complain their blender smells because they clean too late or too lazily. These habits prevent problems:
Clean Immediately After Use
Waiting even 10 minutes lets food dry and stick.
Don’t Store It Wet
Moisture = mold.
Don’t Use Harsh Scrubbers
They scratch the jar and trap odors.
Avoid Overfilling
Overflow food slips under the blade base and causes odor.
Store With Lid Off
Prevents trapped smell and moisture.
What Not to Do (Most People Break Their Blender This Way)
Here’s the blunt truth: people damage blenders because they don’t follow basic rules.
Don’t:
- Dip the base in water
- Use boiling water unless manual says it’s safe
- Use steel scrubbers
- Force the blade to spin with your hand
- Leave food inside for hours
- Store it closed and wet
All of these reduce the blender’s lifespan.
Simple Daily Cleaning Routine (So You Never Hate Washing It Again)
This routine takes less than 60 seconds and avoids long-term damage.
- Immediately rinse the jar with warm water
- Add water + a drop of dish soap
- Blend
- Rinse
- Dry upside down
- Leave the lid open
If you follow this, deep cleaning becomes effortless.
Final Thoughts: Clean Your Blender the Smart Way
Cleaning a blender isn’t rocket science, but doing it wrong makes your kitchen smell bad and shortens the machine’s life. Whether you blend smoothies, chutneys, soups, or spices, the simple truth is: clean it immediately, clean it properly, and clean all the hidden parts.
Do it right, and your blender stays fresh, powerful, and hygienic for years.