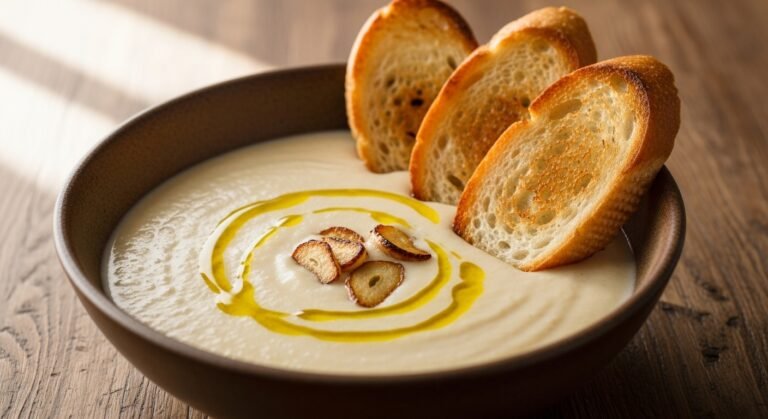
Creamy Homemade Garlic Aioli in Minutes
What Makes Garlic Aioli Special
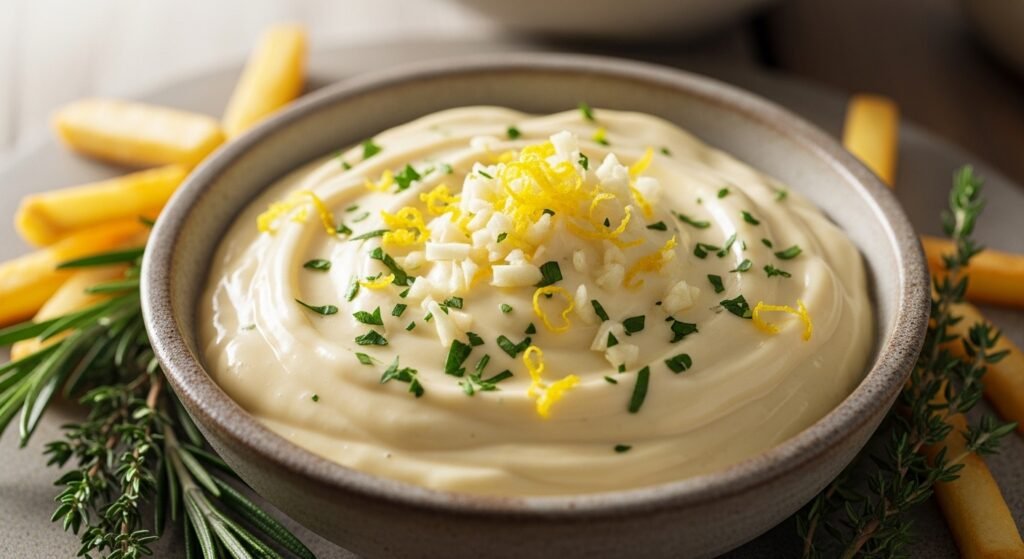
Garlic aioli isn’t just another sauce — it’s a bold, creamy, punchy condiment that instantly upgrades almost anything you pair it with. Its flavor hits harder than regular mayonnaise and carries a rich garlic aroma that transforms simple food into something addictive. The reason people obsess over aioli is simple: it’s easy to make, incredibly versatile, and tastes far better than anything store-bought. At its core, aioli is an emulsion, meaning oil and liquid are forced to combine into a smooth, thick mixture. When done right, you get a silky, luxurious dip with a strong garlic kick.
Key Ingredients for Perfect Garlic Aioli
A great garlic aioli recipe relies on a balance of a few straightforward ingredients. You’re not working with anything fancy, so the quality of each item matters. Here’s what you need and why it matters:
Garlic: The star. Fresh garlic gives strong, sharp flavor. Roasted garlic gives a sweet, mellow taste.
Egg yolks: The emulsifier. They bind everything and create creaminess.
Oil: Use neutral oil like sunflower, canola, or light olive oil. Extra virgin olive oil is too strong and can make the aioli bitter.
Lemon juice: Provides acidity and freshness.
Salt: Enhances all the flavors.
Optional add-ins: Dijon mustard, black pepper, smoked paprika, roasted garlic, herbs.
If you mess up any ingredient — use stale garlic, strong olive oil, or skip acidity — the final flavor will suffer. Don’t cut corners here.
How to Make Traditional Garlic Aioli
Classic garlic aioli is made by hand and takes some effort, but the result is worth it.
Step 1: Crush the Garlic
You need a smooth paste, not chunky bits. Use a knife and coarse salt to grind the garlic into a fine, creamy texture. The salt breaks down the garlic fibers faster.
Step 2: Whisk the Egg Yolks
Put your egg yolks in a mixing bowl. Whisk until smooth. This is your base.
Step 3: Add Oil Slowly
This is where people screw up. If you pour oil too fast, your aioli splits. You must start with a few drops at a time, whisking constantly. When it starts thickening, you can increase the speed of adding oil.
Step 4: Add Lemon Juice and Seasoning
Once emulsified, mix in lemon juice, salt, and any optional add-ins. Taste and adjust.
You should now have a thick, glossy, garlic-packed aioli ready to use.
Faster Method: Garlic Aioli in a Blender
If you don’t have time to whisk like a chef, you can make aioli in 30 seconds using a blender or immersion blender. The emulsification works almost automatically.
Ingredients
Same as traditional, except you can add one whole egg instead of just yolks.
Method
- Add garlic, egg, lemon juice, and seasoning to the blender jar.
- Pour oil on top.
- Blend until thick and creamy.
- Taste, adjust salt or lemon, and you’re done.
This version is foolproof, especially for beginners.
Choosing the Right Garlic for Aioli
Garlic flavor depends on how you prep it. Most people use raw garlic, but that gives a sharp bite. If you want a smoother taste, roast your garlic.
Raw Garlic
Strong, intense, spicy. Best for bold flavor lovers.
Roasted Garlic
Sweet, buttery, mild. Great for burgers, roasted vegetables, and sandwiches.
Grated Garlic vs. Minced Garlic
Grating garlic releases more oils and gives a stronger flavor. Mincing makes it milder. Crushing with salt balances intensity.
If your aioli tastes harsh, you probably used old garlic or grated too much of the bitter green core. Remove the green sprout to avoid bitterness.
Best Oil for Garlic Aioli
Oil choice decides whether your aioli tastes balanced or disgusting. Don’t use strong olive oil. It ruins the entire sauce and makes it taste bitter.
Ideal Oils
Light olive oil
Canola oil
Sunflower oil
Avocado oil (mild)
Avoid
Extra virgin olive oil
Sesame oil
Coconut oil
Cheap rancid oils
If your aioli separates, your oil-to-egg ratio is off or you added oil too fast. Fix it by whisking a new egg yolk in a bowl and slowly adding the broken aioli into it.
Flavor Variations to Try
If you want to push beyond basic garlic aioli, try these:
Roasted Garlic Aioli
Use soft, caramelized garlic instead of raw for a sweeter, richer flavor.
Spicy Garlic Aioli
Add sriracha, chili flakes, or chipotle peppers for heat.
Herb Garlic Aioli
Mix in parsley, basil, dill, or cilantro for freshness.
Lemon Garlic Aioli
Increase lemon juice and zest for extra brightness.
Smoky Aioli
Use smoked paprika or roasted garlic for a subtle smokiness.
These variations let you adapt aioli for any cuisine — burgers, tacos, fries, salads, grilled meats.
What to Serve with Garlic Aioli
Garlic aioli is ridiculously versatile. You can pair it with almost anything, but here are the best matches:
French Fries: The classic combination.
Burgers: Spread it on buns for a creamy punch.
Roasted Vegetables: Carrots, potatoes, cauliflower, broccoli — everything tastes better.
Sandwiches and Wraps: Works as a replacement for mayonnaise.
Seafood: Shrimp, crab cakes, fish fillets.
Grilled Chicken: Adds richness to lean meats.
Salads: Thinned-out aioli makes a killer dressing.
If you’re not using aioli outside of fries, you’re missing out.
Common Mistakes Beginners Make
Here’s where most people screw up, and how you avoid wasting ingredients:
Mistake 1: Adding Oil Too Fast
Your aioli will split. Slow down.
Mistake 2: Using Strong Olive Oil
The taste becomes bitter and overpowering.
Mistake 3: Weak Garlic Flavor
You probably used old garlic. Fresh garlic has stronger aroma.
Mistake 4: Over-Whisking or Over-Blending
Too much air makes it foam.
Mistake 5: Storing It Wrong
Aioli needs refrigeration and shouldn’t sit out for hours.
If you correct these, your aioli will turn out consistently good.
How to Store Garlic Aioli
Homemade aioli doesn’t last as long as store-bought. You’re working with raw egg yolks, so it’s more delicate.
Storage Tips
Keep it in an airtight container.
Refrigerate immediately.
Use within 3–4 days.
Don’t freeze it — it will separate.
If it smells odd or tastes sour, throw it out. Don’t take risks.
Is Garlic Aioli Healthy?
It’s not a “health food,” but it’s better than store-bought mayo packed with preservatives. Aioli contains:
Healthy fats from oils
Antioxidants from garlic
No artificial thickeners
No added sugars
Just don’t drown your meals in it if you’re watching calories — it’s still an oil-based sauce.
Garlic Aioli as a Meal Upgrade
A lot of people underestimate how much a simple sauce can change a dish. Aioli takes a basic meal and gives it a restaurant-style finishing touch.
Fries go from boring to addictive.
Burgers taste richer and juicier.
Chicken becomes more flavorful.
Vegetables suddenly taste exciting.
If you want to make simple home-cooked food look premium, aioli is the easiest upgrade.
Garlic Aioli Recipe (Detailed Breakdown)
Ingredients
2 garlic cloves, crushed
2 egg yolks
1 cup neutral oil
1 tablespoon lemon juice
Salt to taste
Optional: mustard, herbs, paprika
Instructions
- Crush garlic into a paste.
- Whisk egg yolks in a bowl.
- Add oil very slowly while whisking nonstop.
- When thick and smooth, add lemon juice.
- Season with salt and mix well.
- Adjust garlic or lemon as needed.
- Store in the fridge for up to 4 days.
This is the simplest, most reliable method for beginners.
Why Homemade Aioli Beats Store-Bought Every Time
Store-bought “garlic mayo” is usually just mayonnaise with powdered garlic flavoring. Nothing beats the freshness, aroma, and real taste of garlic that you get from homemade aioli.
You control:
Ingredients
Intensity
Thickness
Freshness
Quality
And it costs less to make at home.
Final Thoughts
Garlic aioli is one of the easiest ways to elevate your meals without complicated cooking techniques. A few basic ingredients give you a creamy, bold, luxurious sauce that enhances everything from fries to grilled meats. Whether you whisk it by hand like a chef or blend it in seconds with a mixer, the end result is always worth the effort. Master this recipe once, and you’ll keep making it forever.